


Simple Science Projects for Kids


Stuck home and looking for something to keep the kids busy? Science experiments are a fun and educational way to bust the boredom and keep learning. However, what if you don’t have a huge chemistry set or expensive scientific tools? You can do amazing experiments with items you find around your house that employ the scientific method. Here are 5 simple science experiments for kids.
What Science Experiments Can You Do with Household Item?
Project: Apple Rotting Liquid
Question: Which liquid makes apples rot the quickest?
Materials: Apple cut into thick slices, clean jars, various liquids (for example: vinegar, olive oil, water, corn syrup, salt water), pencil, and paper
Steps:
- Gather materials.
- Have each child hypothesis which liquid will rot
- Fill jars with liquids being used. Label each jar.
- Create a chart or journal to record observations.
- Place an apple slice in each jar.
- Record daily observations for each liquid.
- After 5-7 days remove apple slices and record final results. See how they compare to original hypothesis.
How Do Boats Float?
Project: Tinfoil Boat Floating Experiment
Question: What tinfoil boat design will hold the most pennies and still float?
Materials: tinfoil, pennies, basin or sink that holds water, pencil, and paper
Steps:
- Gather materials.
- Draw our various designs and hypothesize which will hold the most pennies and float.
- Make boats out of tinfoil.
- Fill basin or sink with water.
- Float boats one at a time in the water.
- Gradually add pennies and keep a tally of how many you add.
- When one boat sinks, float the next and repeat the process.
- As an extension activity make modifications to your original designs and test to see how it changes your outcome.

Simple Science Experiments for Kids with Water
Project: Sink or Float
Question: Which household items will sink and which will float?
Materials: Basin or sink full water, collection of household items, paper and pencil
Steps:
- Decide which items you want to test, gather materials. Make sure all items can get wet safely.
- Fill a basin or sink with water.
- Hypothesize which items will float or sink. Record your hypothesis.
- Place items into the water, gently, one at a time.
- Record which ones float and which ones sink.
- Check results against the original hypothesis.
- As an extension activity, retest the items in saltwater.

What Germs Are Lurking in Your House?
Project: Germs in bread
Question: Which surfaces have the most germs?
Materials: loaf of sliced bread, zipper closure plastic bags, items around house, permanent marker, pencil, and paper
Steps:
- Decide which surfaces you want to test.
- Label plastic bags with surfaces you choose.
- Thoroughly wash and dry your hands.
- Rub one slice of bread on each surface and place in corresponding baggie.
- Places baggies flat in a safe place where they will not be disturbed.
- Create a chart for daily observations.
- After a week, compare results to hypothesis.
- As an extension activity, rub dirty hands on a slice or bread. Then repeat with newly washed hands.

What Simple Science Experiments Use Eggs?
Project: Egg Observations
Question: How do various liquids effect eggs? Which ones will dissolve the shell?
Materials: Eggs, glass jars, various liquids (for example: vinegar, salt water, cola, corn syrup, oil, etc.) pencil and paper
Steps
- Gather materials and label jars.
- Hypothesize how liquids will change eggs.
- Fill jars.
- Carefully add eggs.
- Record observations each day.
- After 3-5 days remove eggs and observe changes. (Note: vinegar eggshell can be removed gently in cold water.)
- How did the changes line up with the hypothesis?
- As an extension activity, retry and add food coloring to show how deeply each liquid penetrates.
Would you like to print this list off for later? Click the button below to get an instant PDF file for easy printing.
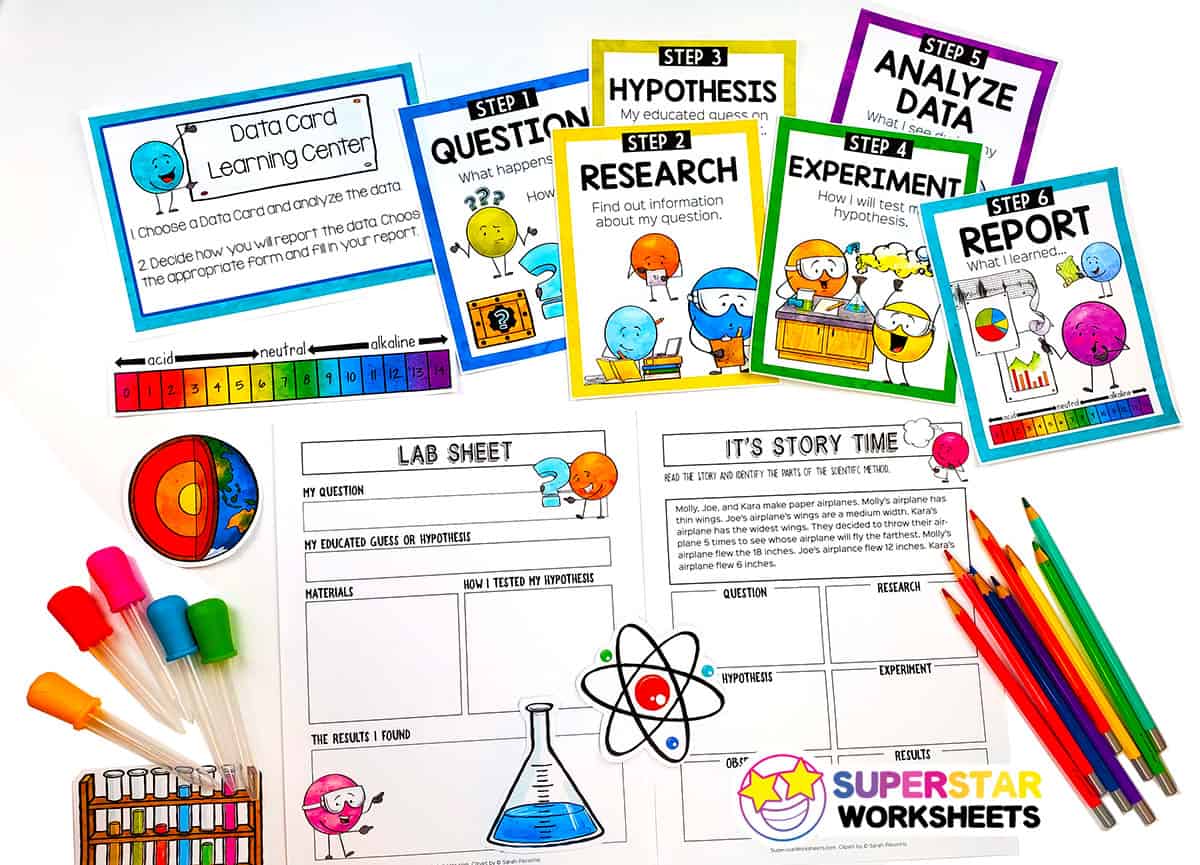
Learn the Scientific Process with our hands-on, interactive Scientific Method Learning Pack! Students will learn the 6 steps of the scientific method: Question, Research, Hypothesis, Experiment, Analyze Data and Report Findings.


Leave a Reply