


The first day of fall brings opportunity for all kinds of stunning art projects for your students. These fabulous fall leaves will look fantastic hanging on a hallway bulletin board, or adorning your classroom walls. This is a simple art project that students of all ages will love.
Fall Leaf Art Project Materials:


First Day of Fall Art Projects

Step 1:
Cut out your leaf template very carefully. If you are using this project with younger students you might cut out the templates beforehand as they are a bit of a challenge. Tape the leaf in the upper right-hand corner as shown in the photo, with the edge of the stem almost off the paper.

Step 2:
Starting with your red chalk pastel, press the flat edge on the end of the leaf and drag it forward away from the leaf and onto the black paper. Continue this stroke always starting on the leaf and pressing away from the leaf.

Step 3:
Choose another warm color like orange and repeat the steps. It is a bit more difficult to get the color into the smaller curves, so using the narrow end of the chalk pastel might help with those areas. Overlap the orange over the red to blend in the color.

Step 4:
Continue this method around the leaf, using colors like cream, yellow, light green, brown, and more fall colors. If younger students have difficulty getting the chalk into the curved areas, it’s okay to just color those sections in. Just emphasize pulling the color in an outwards direction.

Step 5:
Even though we are using mostly Warm colors for this fall leaf, it’s good to bring in a couple of splashes of cool colors for contrast. Use purple and blue to make narrow streaks randomly around the leaf. Also, make sure that the leaf template is completely covered in colors as we’ll be using it for the next part of the project.

Step 6:
Once you have your colors how you like them, carefully lift up the leaf to reveal the shadow. If you have any mistakes you can use a Q-tip and a dab of water to remove any chalk mistakes or to tidy up the edges.

Step 7:
Crumple up the leaf a bit so that it looks like a dried-up fall leaf. Then, tape it near the bottom of the page so that it hangs off the edges and looks like it has fallen. Use the white chalk pastel to draw dashed lines to show the movement of the leaf.
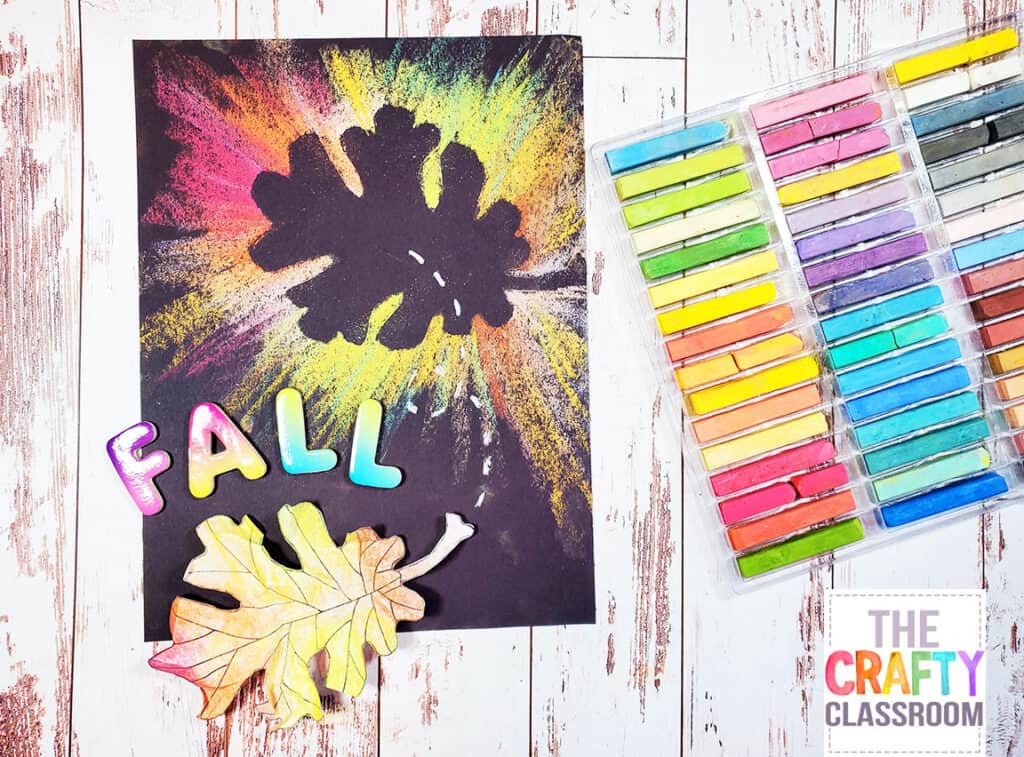
If you like, you can have students add the word “FALL” by cutting colored construction paper, or from some extra Fall themed scrapbook paper. If your having a classroom full of students doing this project, be sure to hang them up on the bulletin board! You can even have each child put a word of a fall poem on their project so that the final display has a special message for people to read as they walk by.
If you find your students like this project, you might try our other Fall Leaf Art Projects or our Chalk Pastel Butterfly Craft. Both are great for learning new art techniques while having fun.

Leave a Reply