


Our Japanese Carp Kites (or more accurately windsocks) make some really beautiful projects for children to make when learning about Japanese culture. This would be a wonderful end of the unit project for your students or co-op groups. Older children might prefer to make these out of fabric see our fabric painting tutorial here.
Japan Books for Kids:


How to Make a Japanese Carp Windsock:
Materials:
- Construction Paper (we used 12 x 18)
- Tissue Paper (Dollar Tree)
- Crepe Streamers (Dollar Tree)
- Scissors
- Glue
- Hole Puncher

Step 1:
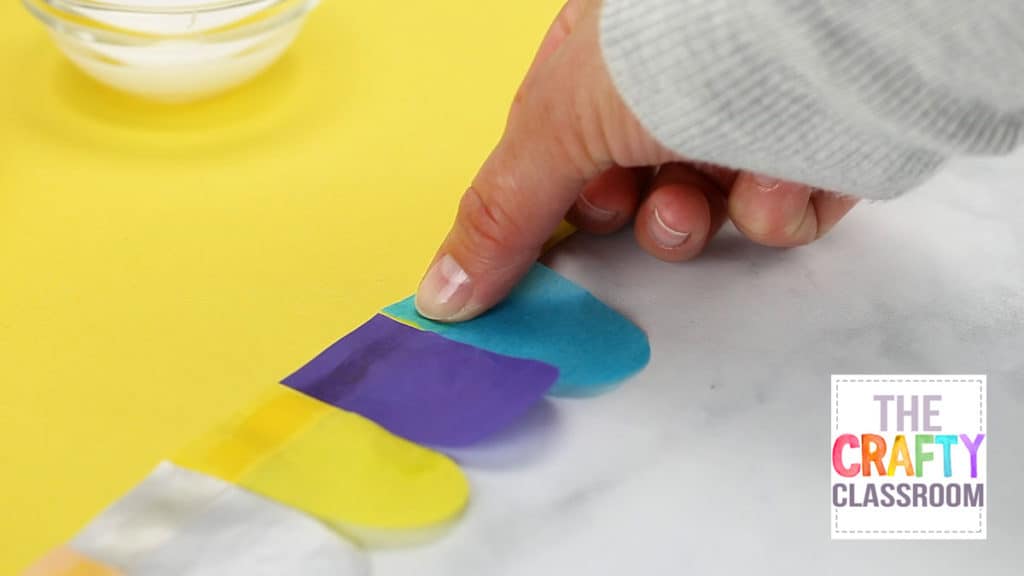
Lay your construction paper horizontally. Cut your tissue paper into the shape of “scales” as shown in the photo. Cut a variety of colors so students will have colorful fish. Dip your paintbrush into the glue and create a line along the bottom.
Step 2:
Carefully place your first row of fish scales along the glue line. Choose a variety of colors or even a pattern of colors. If you have younger students you can draw a glue line in pencil every 2 inches or so. That way they can create straigh lines of glue for their scales.

Step 3:
Glue your scales all the way across the construction paper. Take care to keep your line of scales as straight as possible. The top parts of the scales will be covered by the next row, so if you need to adjust your scale, you have a bit of wiggle room at the top side.

Step 4:
Repeat the first three steps to make 5 or 6 rows of scales. Each row will overlap the previous row as shown in the photos. Stop adding scales once you have about half of the construction paper covered.

Step 5:
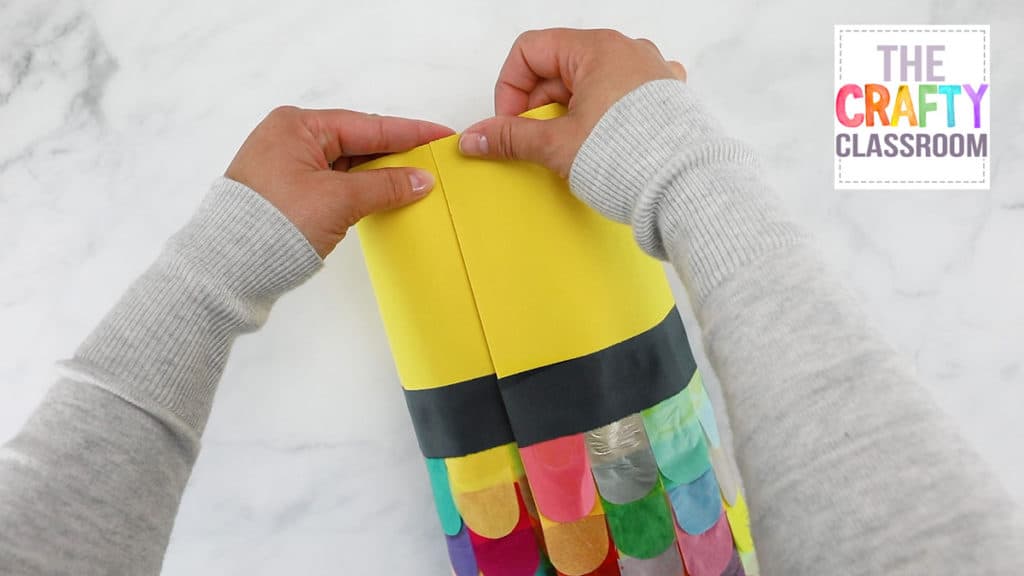
Cut a strip of black construction paper about 2 inches wide and glue it across the top layer of scales. This will hide the ends and serve as the line separating the face and body of the carp.

Step 6:
Cut two almond shaped eyes from the black construction paper and glue them as eyes as shown in the photo.

Step 7:
Flip your project upside down. Cut strips of colorful crepe paper and glue them along the bottom side of the construction paper. Choose a variety of colors.
Step 8:
Roll your paper to connect the edges. Use a stapler to connect the ends near the top, bottom, and if possible the center. If you cannot reach the center with your stapler, use a small bit of glue to help seal the connection.

Step 9:
Then use a hole puncher to place to small holes on either side of the top of the kite. Connect a small piece of yarn through the holes to hand your carp windsock.


Comments (4)
you have amazing projects
[…] Windsock KoiNoBuri thecraftyclassroo … […]
[…] Japanese Karp Kite […]
[…] The Crafty Classroom has easy to follow instructions for making an adorable carp kite craft. […]